Experiencing beauty in your creative life

Thursday, January 27, 2011

A little Valentine inspiration

Good morning everyone.  I thought I would share a little valentine card with you today.  Valentine's Day is one of my favorite holidays.  It give me an excuse to make tons of cards.  The card I am sharing today features red, green, and brown.  A go to color combo for me during any season.
(front)
I added a little extra dimension to the hearts on the tree with liquid glass.  I love how it makes them stand out.  Hint...When adding liquid glass to small elements like these hearts, secure the entire heart to the card with glue dots.  This will keep the paper from curling.

(inside)

The inside is pretty simple.  But I never want to leave it totally blank, a few snips of a scallop scissor, a punched heart and I have a cute and quick page to write my wishes for the recipient of the card.

I am putting together the packets for Friday nights workshop, and it's so exciting.  I am looking forward to seeing all of you.  I you aren't attending  watch for photos of all the fun this weekend.

Thanks for stopping by!
Jamie


Monday, January 24, 2011

IMPORTANT JANUARY WORKSHOP INFO

HI!  Just a quick reminder that my first workshop is this Friday, January 28th.  The RSVP deadline is tomorrow.  Yikes! Your payment holds your reservation.  It is going to be a super fun night.  Hope everyone can make it.

Sorry no photos today.  I'm working on a cute canvas to post soon!

toodles,
Jamie

Sunday, January 23, 2011

Decoupage! Decoupage! Decoupage?

Happy Sunday everyone! 

I have a busy day ahead of me because I spent yesterday, using mod podge and paper on most of the rocks in my back yard.  So I am a little behind on things around the house.  But I did want to take a sec show you how much fun I had.  Before I show you my lovely rocks I have to share a funny story from preschool this week.  Teachers at the children's place please bear with me,  I know you have heard this before, but it's just so darn cute, I have to tell the story one last time.

This week in preschool art classes I introduce the children to the art of decoupage.  As budget for supplies is always a concern I "borrowed" 75 rocks from Bodine's rock garden in the back yard and gave the children an assortment of papers and shapes to adhere to the rocks.  When I introduce new vocabulary to the children, I like to use the words frequently while they are working so that they retain them.  Example..."This is decoupage.  When you use a gluing medium to attach papers to an object it is called decoupage."  "Look at you!  You are doing decoupage!"  and so it continues.  Wednesday I was in my usual teaching mode using the term "decoupage" 30 times in the first five minutes and then I ask, "Do you like decoupage?"  and the response was, "Decoupage? What is decoupage?"    Don't you love it?

So as happens many times after working on a project at preschool I was inspired to try my own decoupage rock projects.

First is one of a little landscape.  I knew I wanted to do a little house, but I was pleasantly surprised to find that the rock had a little crack the worked perfectly as the horizon.


Second is one with the little triangle banners that are all the rage right now.  "Celebrate" is a rub on.  It is simple, but I like it.


Lastly, I made this one for Bodine (only fair because they are his rocks)  I think I might save it for Valentine's Day.  Good thing he doesn't read my blog!


I learned so much while making these.  Just a few tips if you decide to try your own.  If you want to stamp something on the paper you are putting on your rock, and you are using a water base ink, Stamp the papers before you add them to you the rock.  Heat set the ink before covering with mod podge.  If you are going to print words on you ink jet printer as I did for "love lives here",  heat set that ink as well.  My heart ran a little.  To avoid any of that trouble just use rub ons instead of rubber stamps on the rocks and papers.  The slick surface that is left when the mod podge dries can be a little dicey with inks and stamps, but works perfectly with rub ons.

Thanks for stopping by!
 Jamie

PS - Don't forget to sign up for the workshop by this Tuesday, the 25th.  Your $10.00 payment holds your spot.  Thanks to everyone who has paid already.  If you need a paypal invoice just let me know.

Have a great week.

Tuesday, January 18, 2011

Basic Paper Crafting Tool Kit

Hi All!  As promised this is a list of the essentials you need to have to complete your project and a few extra tools that make my all time favorite list.  If you have any trouble putting this together just give me a holler, I will be happy to help.

Tool Kit
Scissors (love my CTMH micro tip scissors, also a big fan of the fiscars no stick craft scissors.)

Pencil

Paper trimmer  I use my Fiscars Euro trimmer.  Small enough to be portable, but large enough to cut 12" sheets.

Bone Folder

Adhesive Many of you know of my long running love affair with tombow, so you might be surprised to hear that I have made a little switch.  I was noticing that here and there my tombow projects were separating.  I blamed several different things - humidity, rain, I applied it too quickly, I didn't apply enough - what ever the reason was I decided to jump ship in January and try a new adhesive. 
Here it is...


Glue Arts "Glue Glider Pro"  I have to admit, it seemed very giant at first, but I am loving it.  The bond is great!  The best part for me has been the amount of adhesive in one cartridge.  I used to change tombow refills all the time, but not with this!  Bring what you love to use but if you are looking for something new, I highly recommend this product.

Glue dots   In addition to your regular adhesive it is always a good idea to have some sticky glue dots in you bag.  They are very handy for buttons, jewels and even holding ribbon in place.

Pop dots  Foam squares or circles or scraps with adhesive on each side.

Piercing tool  This tool can easily be replaced by a large needle, I use it at least once on every project.  I will say that CTMH makes a great one with a wood handle if you are in the market.  I think it even comes with a self healing mat now.

Ruler

Nail file/Sandpaper  Great for smoothing out paper covered chipboard edges and distressing all sorts of papers and cardstock.

Optional 
      sponge daubers and favorite color of distressing ink  In the bee workshops ink distressing will be optional.  If you love love love to ink distress please bring supplies for this technique.  I hate to sound like a broken record, but if you are in the market for some good distressing ink pads CTMH makes a great pair - you get brown and black in the set.  The pads are about 1" square and are the best for straight to paper application.


Saturday, January 15, 2011

It's time! The January BEE Workshop is now registering!

I am so excited about this post.  I have missed teaching paper craft classes more than I ever imagined I would.  I have missed the design process and creating samples, but even more, I have missed the great times this group always has when we are crafting together.  So here it is...

January BEE Workshop!
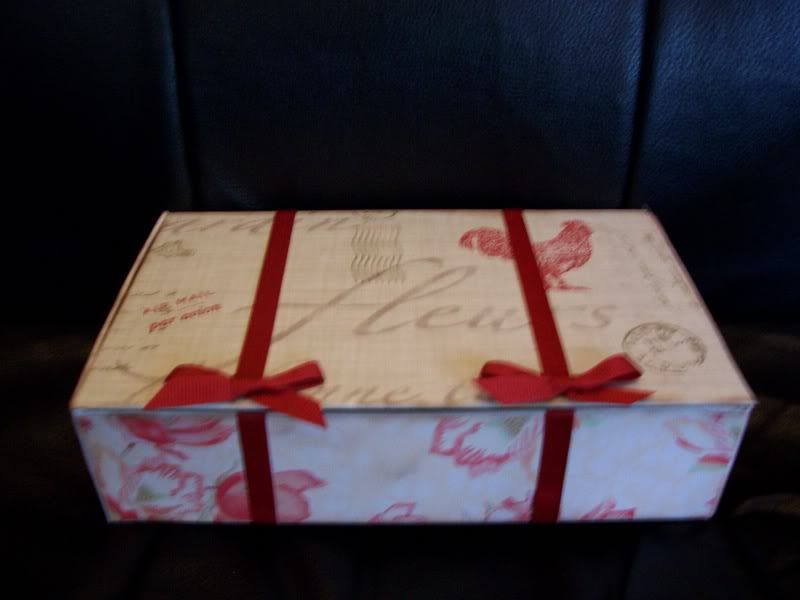
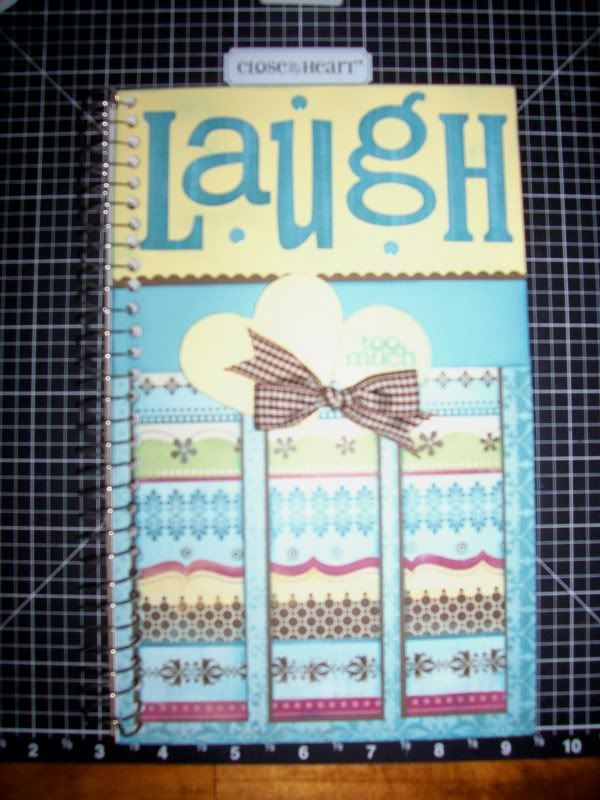
Card box with inserts

The box is made from very sturdy chipboard.This is a photo of the box closed, I love that scalloped edge - and oh that charm!


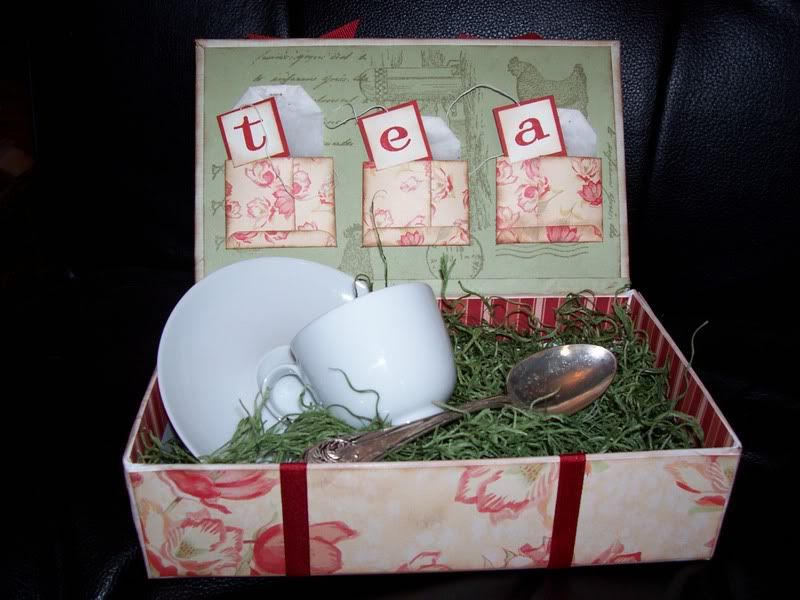
This is the open box, it will have a magnetic closure.  They are in custody of the UPS man but should arrive this week.


You can choose from four choices of inserts 1) Monogrammed enclosure card 2)Book plates  3) Simple folded card with initial or 4) Not shown - A personal calling card with name, address, phone, and email address.  You will make four of one style.  They can be your name or have me print a friends info and make them for a gift.


Are you excited yet?  I am!
Here are a few more details:

Date:  Friday, January 28th.

Time: 7-9pm

Place: Jazzercise (At the Denton outlet mall, the intersection of Loop 288 & I35.)
This means tons of table space to work!  Thanks to Sally Knabe for making it possible.

Cost:  $10.00,  If you cannot attend the workshop, but would like a project kit it can be purchased for $10.00 as well.  Just order before the RSVP deadline.

Supplies you need to bring:  Basic paper crafting tool kit.  If you have attended my workshops in the past you are familiar with what this means.  If not check the blog this Wednesday for a full explanation of what the "basic paper crafting tool kit" contains.

RSVP deadline:  January 25th.  Some of you may ask why do I have a deadline for responses.  I want to be sure that all of the project kits and supplies accurately prepared.  Although you do much of the work, there is some cutting and prep work I do before the workshop.

Project details:  This project will be completed with natural chip board and Life's journey designer papers by K&Company.  As you arrive at the workshop you will have the opportunity to select your paper from the collection.  This is fabulous paper, printed on both sides for lots of variety.

Food???  Of course - Light refreshments will be served.

Discounts???  Of course - Have a friend (who is new to my workshops) sign up and receive $1.00 off you workshop fee.


Are you ready to save your place?  You can leave a comment here with the name of the insert you have chosen or email me with the same info.  Payments can be mailed to my home address, dropped by the house or if you prefer I can send you a paypal invoice.  Easy peasy!

I am sure that I am forgetting something...let me know if you think of any other information.

Toodles!
Jamie


Thursday, January 13, 2011

And the winner is...

Gloria Smith!  Congrats!  Thanks to everyone for all of the helpful feedback on days and times that work best for you.  I will post the exciting details of our first "BEE" workshop Sunday evening so be sure to check back!  For now I will leave you with a little stamping inspiration.  This is just a plain "school box".  I covered it with a little patterned and stamped paper, added a little ribbon, and voila!  A little tea time gift. 


Have a great weekend.
Jamie

Saturday, January 8, 2011

Workshop plans are coming together fast - Add your opinion now & have the chance to win free stamps!

Hi Girls!  The planning process is so exciting, but a little daunting as well.  I want to make the workshops available to as many of you as possible.  Thus the questions...When?  and Where?  I am checking with a couple of local facilities but wanted to get some info from you before making my final decision.  So here is your chance to be heard.  I am looking at M-F evenings or Saturday Mornings.  If you are choosing the evening option please specify the best day.  Everyone who posts and opinion before Tuesday, Jan.11 at 5:00 pm will have their name put in a drawing for the darling Hero Arts owl stamps.


Thanks for the input and Good Luck!
Jamie

Wednesday, January 5, 2011

Thank you so much!

Thanks to everyone who has sent an email over the last week.  I just thought I was excited about getting started, but your well wishes and kind words have sent me over the top.  I am working hard on the project for the first workshop.  As soon as it is finished I will post a photo and all the details about the date time and place.  Special thanks go to Corwyn Raesz who is helping me get some changes made...hopefully you can see the links better in their new colors. 

I had several emails asking how to leave a comment, all you have to do is click on the word "comment" at the bottom of the post and it should open a screen with a comment box.  You are welcome to email me with questions and comments if you prefer.

I have created an email list to give you a heads up when there is a new post.  If you know someone who would like to be added to the list just let me know!

For now I thought I would post a photo of my art journal.  Do you have one?  I find that sometimes I have so many ideas and projects I want to try I can't remember them all.  This is just a little sketch pad I bought.  I dolled up the cover and voila!  All the ideas go into the book - some hand written, some pictures from magazines and blogs.  They stay right there until I can get to them! 

                                                 art journal 

Have a great night girls!
Jamie

Sunday, January 2, 2011

Welcome to BEE!

Are you ready for some new workshops?  Thanks to everyone who encouraged me over the past year.  I took your advice and I am ready to offer a new kind of workshop for those of you who missed being creative together.

Projects - scrapbooking, card making, mixed media canvases, jewelry making, rubber stamping and much much more!

Announcements - Workshop dates and details will be posted on this blog.  Yeah!  Super easy to view the projects that will be taught that month along with all the details as far as supplies you need to bring, cost of the workshop, date, time and location.

Sign up - Easy as can be just email me at jjjjmc@msn.com.

Payments - I know in the past there has been no cost for my workshops, so you may be thinking, "what?"...but I promise this will be a much better system for you and me as well.  Previous workshops have been linked to a minimum purchase of CTMH supplies and you were also obligated to commit to purchases for an entire year.  NOT NOW!  Now you just sign up for the workshops you want to attend and pay only for the supplies we use at the workshop.  Payments can be made to me through paypal, or drop a check to me in the mail (making sure it will reach me by the registration deadline).

Leave me a comment if you think this sounds fun!

Thanks so much for visiting, I am really new to the blog thing, so you will probably notice a few changes over the next month or so while I tweak the appearance and functions. 


Happy New Year!
Jamie