Experiencing beauty in your creative life

Wednesday, August 10, 2011

The cutest thing I have ever seen...

No it's not something I made, but something I came across this morning while reading email.  I should definitely add that had I owned this hat - in blue -  when my boys were babies, I know their pictures in it would have been cuter (wink). 

This was on an ETSY sight you can find here.  Along with some other super cute hats and headbands for little ones.  Are you dieing?  She just makes me smile.

Photo credits: Ann James Photography


Now on to a little stamping...

I am still using this little silhouette stamp more than anything else I own right now.  Every time I start a project, especially when I am using those vintage inspired digital  papers by Iralamija,  I look down and find this stamp in my hand.

The super cool thing about this card is that the six smaller papers behind the main image are actually one panel.  So instead of measuring, cutting and piecing six different pattern papers you need only cut one piece.  So easy and I am pleased with the out come.  "Easy" and "happy with the result" rarely go together when I am stamping and I'm delighted to finally use them both to describe a project. 

Short and sweet on the inside. 

Have you been working on any quick and easy projects of your own lately?  I would love to see what you have been up to.  Email me a photo and I will post it here.

Thanks for stopping by!

jamie
 

Monday, August 1, 2011

Banners & Silhouettes, I'm hooked!

I am in love, love, love with the silhouette stamps that I see these days.  If it features children add one more love to that statement.  Here I combined the banners, children's silhouette stamps, and a favorite new find of mine...digital images by Iralamija.  Each banner is made with a different digital image I purchased from her  Etsy shop.  (Click the name above to go to her shop)


I have been a little leery of digital images in the past but really couldn't find any shabby chic style papers at local craft stores.  So I took a chance and bought a few.  Then I went back and bought a few more.  No waiting on that stinky old UPS man either, she emails them to you within 24 hours of your purchase.  They print out beautifully, you can resize them and print them as much as you like!  You can let go now, you don't have to hoard papers for fear you "will want another piece of that beautiful sheet music with the roses behind it" and not be able to find it.  It is on your computer!  Can you hear the angels singing?

I enjoyed making this card so much I decided to keep the blueprint and enlarge it a bit to make a cover for my lesson plan binder.

Yes!  Those scrabble tiles are some of the images she has available.  Is your heart leaping with joy?  I printed mine on regular copy paper, cut out, glued them to chip board squares and distressed the edges a little.  I can't wait to do lesson plans now.  If you plan to make a project with dimension for a binder cover I suggest making it about 1/2" to 1" smaller than the size of the opening.  That way there is enough room in the plastic sleeve for anything extra thick.

I hope your week is off to a good start!
jamie


Saturday, July 30, 2011

Scraps are Super!!!!

Good morning everyone!  I have been trying to make at least one Birthday card each day for the last week or so.  I have been pretty good about it and my birthday card box is filling up quickly.  I love to have a good supply, so when I need a card and don't have time to make one I have lots of options to choose from for the special Birthday Person.  This is a little card I whipped up in about ten minutes.  No kidding!  I used some scraps from my black cardstock file, a great PTI stamp set and the card was finished in a snap.


And because the card front was so quick and easy...I played a around a little with the inside of the card.


Everything I used was a scrap, no full size sheets of paper or rolls of ribbon needed.  I love that!


So then this morning while doing my weekly Saturday Morning Blog Reading Session I was thrilled to read this great post by Betsy Veldman .  It's a great article about organizing and using your scraps.  Take a minute to see what she did...I know you will love it.  If you decide to make some of your own scrap paper sheets be sure to let me know how it works out.  I will definitely be giving this a try today (or soon anyway). 

Have a great weekend! 
jamie

Monday, July 25, 2011

Mixed Media...Mixed Emotions

I love paper!  Probably a little more that I should, but it just calls me.  So when I started this mixed media canvas for my Great Niece Macy, of course I started with papers.  I painstakingly scoured my collection of papers for hours to find just the right patterns and textures for this project.  I painted the canvas background and then began decoupaging the paper.  Making sure each design was placed in just he right spot.  Then as with any mixed media project I began layering with paint, pieced paper images, glitter and embellishments.  I was pleased with the end result, but something was bothering me, the papers I had so carefully chosen, were not the prominent fixture in the piece I thought they would be.  Then it came to me, if you look closely you can see the pink roses, green gingham and vintage labels that provide the backdrop for the Princess Bear.   I now realize  they are a hidden treasure in the artwork.  Which makes me very happy. 


Here is Macy - On Christmas morning with her sweet mom and dad (Lainey and Eric). 

Happy Birthday Macy!

Thanks for stopping by to look at what's been happening around here!  Have a great week! 
jamie


Thursday, July 21, 2011

Divide and Conquer

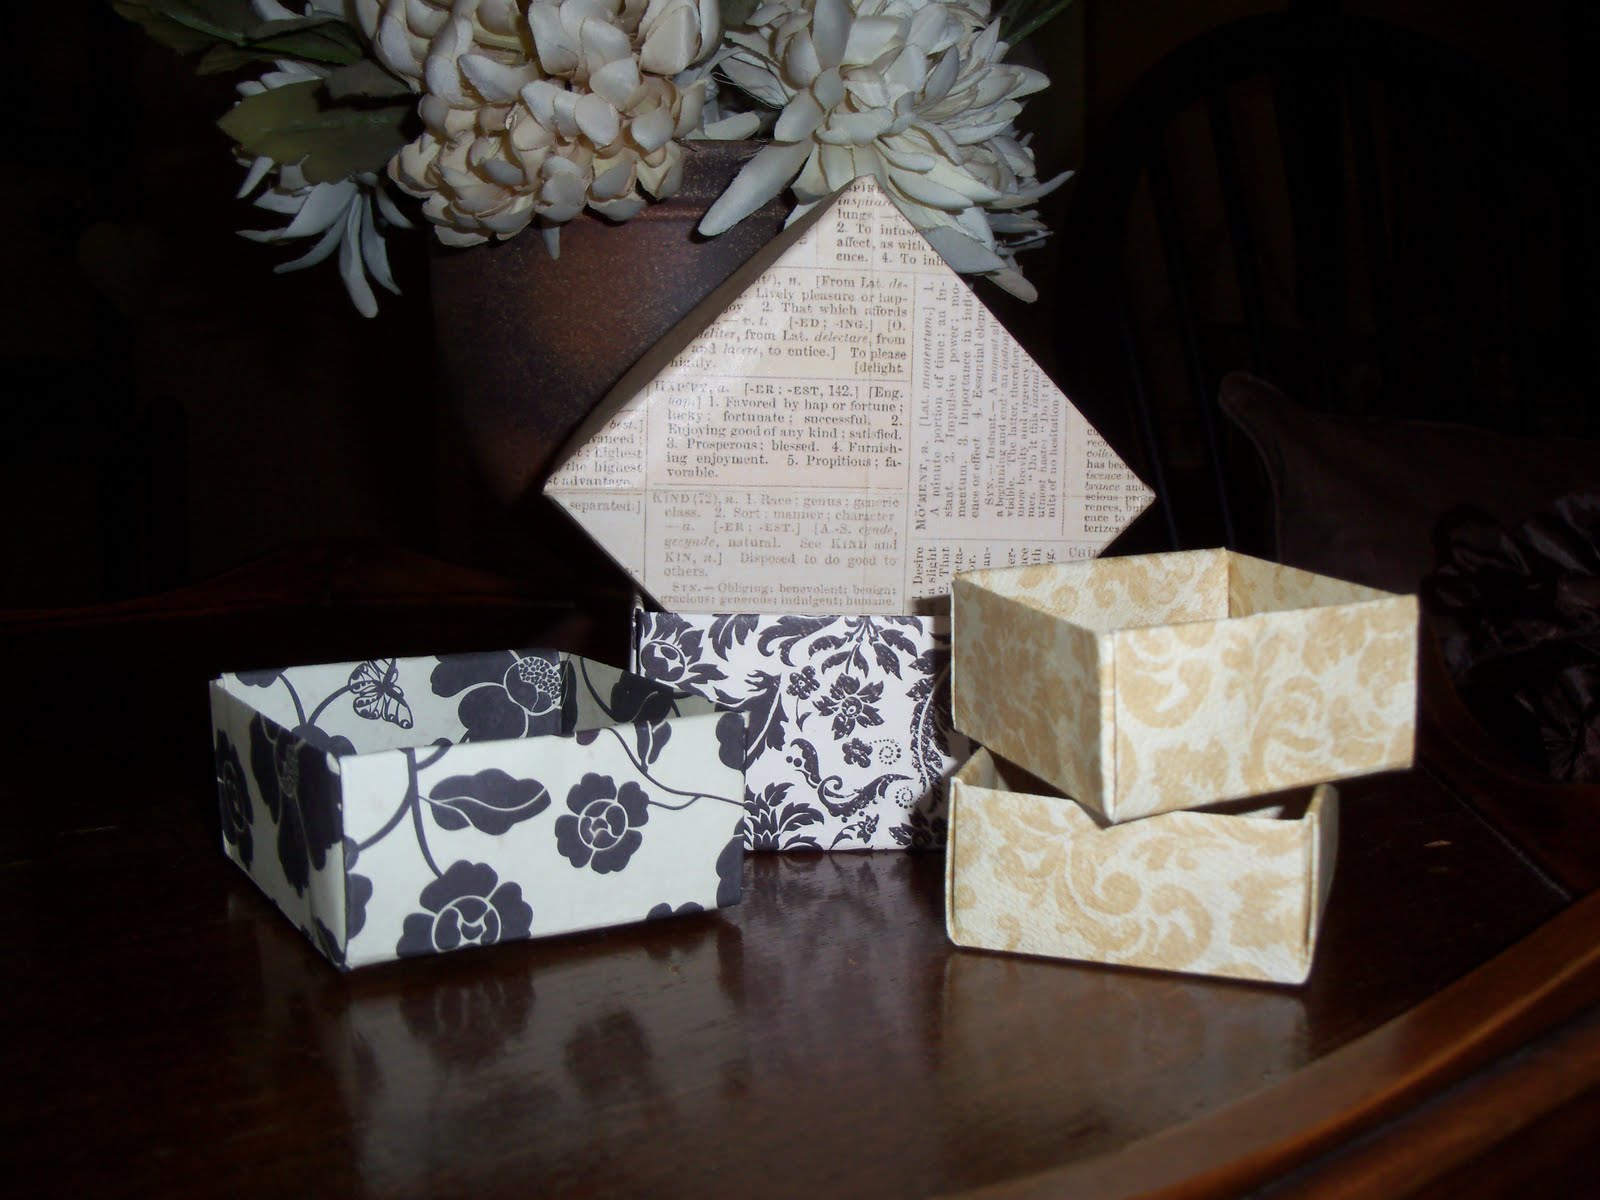
That is my strategy as far as organizing my jewelry this summer.  It's no secret I love jewelry, and also no surprise that I really like to keep it organized.  We recently purchased a small dresser at Kirklands (click the link to see the cute black dresser on their web site).  It is only 12" deep so I thought it would be a great place to store my ever growing collection of jewels.  I looked at several different types of organization trays for jewelry but wasn't able to find anything I was in love with...so I did what any crafty girl would do...I made my own.  I started by making three different size boxes. You can find the tutorial here.

Large, using 10" X 10" paper 
Medium using 8" X 8" paper
Small using  6" X 6" paper


Here they are in one of the drawers...

from a different angle...


I'm not sure if you can tell, but the drawers are deep enough to stack the boxes two deep.  I filled the drawer completely with boxes from one end to the other, and then assembled the top layer.

I glued six of the boxes to a piece of chip board so now what you see pictured above is one piece that sits on top of the first layer of boxes.  I made two, which allows me room to slide them from side to side or just lift out this grouping, so I can view the jewels stored in the bottom layer.

This is a picture of the small boxes, they are great for rings, pins, earrings and smaller pieces.  They fit in the drawer three deep so for the top layer I joined nine boxes.


And since you got a little shot of my assisant's behind in one of the photos, I thought I would give you a more flattering view.  He's quite dependable and works for treats.

Jack


Do you have any creative ways to use these little boxes?  I would love to hear them!

Have a great day!
jamie

Sunday, July 17, 2011

Free 8 X 10 Canvas! Yippie!

Good morning!  I want to share a wonderful deal with you today.  Right now at canvas people  you can get a free 8 X 10 photo canvas or $50.00 off of a larger size.  At the beginning of the summer they were running the same offer and I order the canvas pictured below.  I LOVE it! 
 Happy shopping!

Yours,
jamie

Saturday, July 9, 2011

Just a little Birthday card

Happy Saturday everyone!  I hope you found a way to stay cool.  Today I worked on a light box project.  It is supposed to help with lighting issues when taking pictures of cards and other projects.  I decided to try it out with this little birthday card I whipped up the other day.  It was definitely one of those ten minute or less projects. I really need to work on my stash of birthday cards, the options left in the card box this last month have been very few.

I think I like how the photo turned out...The rustic look of my backyard landscape didn't really match my stamping style.

Enjoy the rest of your weekend!  Thanks for stopping by,
jamie