Experiencing beauty in your creative life

Monday, August 12, 2013

Ca - Caw, Ca - Caw!

It was not unusual to hear that sound around our house or anywhere we were out with my oldest son.  He used this call to find us when we had separated or just to get our attention.  And  no, he wasn't a small child - this was something that started in his early teens and continues today.  While creating this project, I was sure that if he still lived at home, there would have been a great deal 
of "Ca-caw"ing going on around here.


This little crow was inspired by this chicken pin cushion,  it's not lost on me that they really have very little in common, but that's the way my creative process works.  Crazy?  I know!


The base is a basic flower pin cushion.   I figured that this would make a lovely little fall gift for a friend, so I used the pattern  to create a card as well.  
I loved having a matching card and I thing I will definitely be trying this again.
The paper version is a little bit larger than the pin cushion.  I guess the seams and stuffing fluff him out a little and make her wider and shorter.
If you are feeling crafty please check out the link above, it's a wonderful and simple pattern.  Although it is for a family of chickens, it can be easily adapted to be any kind of bird you want.

I would love to hear what kind of bird you decide to try!

Thanks for stopping by,
jamie

Linking up at - Monday Funday

There are over 480 incredible ideas here!

and

The Sunday Showcase Party
By Stephanie Lynn
This is a beautiful blog!

Tuesday, August 6, 2013

Two of my favorite things!

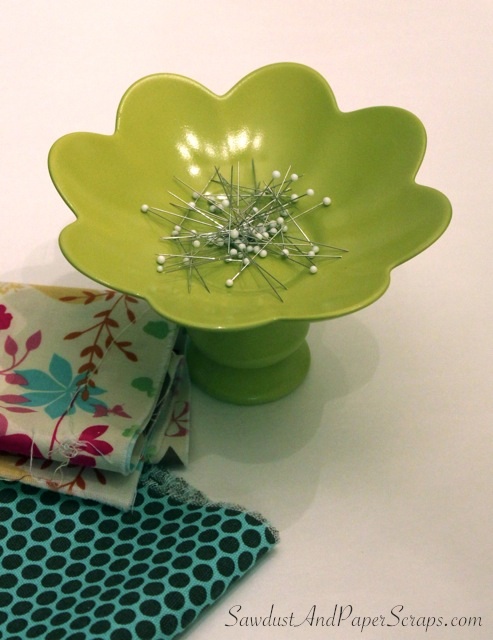
Hi everyone!  Today's project was inspired by a post on Sawdustgirl .  I love dishes and I love pin cushions, so it was a must try project for me.  Below is a photo of the original.  It is a great tutorial, she actually starts with glass pieces and paints them to get this gorgeous green color.
Sticking with the "use what you have" theme, I raided one of secret storage spots and found some super pretty red and white pieces that were a perfect fit.  Using dishes as they are made the process very simple.

1.  Wipe down dishes to make sure they are dust free.  Collect some Mighty Magnets.  These were purchased at Office Depot .  You will also need some adhesive, I chose Goop. If you are using the open end of the base bottom up, glue the magnets to the top piece.  If you are going to use the closed end up, you will glue the magnets to the bottom of the base piece. (shown below)


2.  Once the glue has dried glue the two pieces together.


Voila!  When the glue is dried, flip the dish over and it is ready to collect your pins.


This view shows some pretty hefty "hanger" paper clips.  They are not going anywhere and neither will your pins.


This project is linked up with the Pintrest Challenge at Happy-Go-Lucky.  Be sure to check out all the great Pintrest Projects that have come to life.

toodles,
jamie


Wednesday, July 31, 2013

Found Object + Paint + nails = Treasure!

My husband has learned over the last 22 years that I will freak out over the strangest things.  Things he thinks are scraps or trash.  So when we recently installed a new dog door, he didn't even think twice when I screamed and said, "Can I have that piece of the door?!?!"  It usually takes some serious study of the object to figure out what it will be transformed into, but with my pantry to sewing room conversion in full swing, the idea came pretty quickly.


The door was already black and I love the contrast with the taupe walls.  I am an old school kind of craft girl, so I used my computer to print out the text and carbon paper (Yes...I know it is 2013!) to transfer the image.  Painted over the transfer with white paint to get a crisp image of the text.  If you have a Cricut, you could easily cut paper or vinyl to add the wording.


Then marks were measured, nails were hammered and spools were put in place.  And yes, if you were wondering, I am in love with it!

 Have you ever saved something odd and turned it into a treasure?  I would love to hear your story.

toodles,
jamie

Linking up at...

Link party every Wednesday over at the36thavenue.com

Thursday, July 25, 2013

My new best friend

I'm not sure what her name is yet, but she is a real "doll".


This simple project started with inspiration from Tim Holtz.  His Broken Doll figures caught my attention on Etsy.  It is as if they were made to be pincushions.  The package comes with two dolls.  Which was perfect for me - one to give and one to keep.  


The golden toile that makes her skirt was a piece of a vintage little girl's jumper.  The jumper was worn in several spots and not really befitting a princess, but cut and pieced together it looks good as new.


This last photo is my favorite view of this little lady,  I wish I could pull off a bustle like that!

So, any ideas what her name is?  Help please!

Toodles,
jamie

linking up at

High-5


Sunday, July 21, 2013

Dance, but don't forget

Today's post features a sweet little card 
with an image from
Crafty Secrets.  It was a quick and easy 
project that made me smile.  A girl and pup 
dancing through a field. I hope that you have 
all had many summer moments that feel like this.

But while we dance, I think it is important to  take time to remember those who are in the midst of struggles.

Last Friday I took a little day trip to Tulsa, OK.  On my way I passed through Moore.  My family and friends had seen the devastation on News programs, but nothing prepared me for what I saw last week.  Something about driving through the completely rubble filled areas struck me much more than what I had seen on television.  Seeing the people, still going about their lives while the devastation surrounded them was a jarring experience for me.  These people still need our help and I would like to make it nice and easy for anyone is blessed enough to have a little something to share with them.  Below I have listed several links, all of which are still taking donations for the tornado victims in Moore, OK.  Please forward this post to friends and family that may be able to help as well. 


Thanks for letting me tug at your heart strings today,
jamie  

Tuesday, July 16, 2013

I've got the blues!

Not the "sad" kind, but the kind where blue papers and embellishments are my favorite choice for creating.  It has been a little rainy here in North Texas, but that makes for perfect stamping conditions.  This little card includes one of my favorite Hero Arts stamps "Musical Walk".  The other day while shopping at the  local Hobby lobby (No, I didn't buy ANY card making materials) there were several of these in their clearance bin.  So if you like this stamp, a great deal might be in your future.

In addition to some beautiful papers and a favorite stamp this card is filled with many little bits and pieces of vintage trims found at a wonderful little booth at the Antique Gallery.  Pom pom trim lines the bottom, a bow created with scraps of vintage seam binding and a teeny tiny piece of lace provides a sweet little back ground for the framed blue rose.  The mulberry paper flower is from Emma's Paperie. The pearl pins are corsage pins from Michael's.  They are pretty and no where near the price of hand made pins, but the impact is just as lovely.  


Headers are an architectural elements that have always caught my eye.  I even have a "pediment" board on Pintrest.  So when I saw Tim Holtz's new Big Die Pediments it seemed like the perfect die for me.  Tim Holtz has such a wonderful way of designing products that offer eye catching shapes with embossed details.


What color have you been drawn to this summer?

Have a wonderful day!
jamie

linking up at:
C.R.A.F.T. Monday Funday
Uncommon Designs

Friday, July 12, 2013

A little doll

Hi all!  I am still stamping, but having a little glitch with uploading new photos to BEE.  So it seemed like a perfect time to share a sewing project from this spring.  It started out with a vintage handkerchief  picked up at a local antique mall.  Just a white hankie, with one embroidered corner.  This project was inspired by a Pintrest project that you can find on my  "For my scissors" board.  

 Basic tube construction was used, adding a little pocket on the back. The base is anchored with a large blue button.  Embroidery floss hair and a little shawl (made with the detailed corner of the handkerchief) added some personality. Additional sewing notions help balance her for standing.


The pink polka dot scissors seemed the perfect accessories for this little girl.  This was a such a fun project.  As the mother of two boys, I didn't get to braid hair in the mornings before school, so I have to admit, the hair was one of my favorite elements.

Have you been inspired by a Pintrest project?  I would love to hear about it!

Have a wonderful weekend,
jamie

Linking up at 

The Inspiration Gallery Link Party


and

2013 Shab Friday logo


Be sure to check out all of the wonderful ideas and recipes!  

Thursday, June 13, 2013

Day two! I passed a major test today

I'm back and very excited!  You might be thinking that I am excited about keeping up with my own challenge, but that's not it!  Once I commit to something it's pretty easy for me to stick with the routine.  I will share my triumph later, but first  today's card...


To keep things nice and easy, this card uses the same papers, inks and stamps as the card that was featured yesterday.  It is a pretty basic layout, there was a bow on the spine, but after some thought, it needed to go.  I often tell my young art students that one of the most difficult parts of being an artist is knowing when to stop.  My process involves leaving my projects visible on a side table while tidying my work space or working on my next creation.  This allows me to review the composition, colors, and elements used and decide if the project is really finished.  Sometimes things need to be added, sometimes things need to be taken away.  Sometimes it's just right.

What's your process?


  The inside is just as straight forward as the front, two rectangles - two quick stamps and done.


Now the story of my harrowing trip to Jo Ann.   All of the card making around here the last two days has left me in need of some adhesive.  Easy enough, right?  Wrong.  If I haven't introduced myself let me do so now, "Hi, my name is Jamie, and I'm addicted to paper."    Do you know what is just around the corner from the glue at Jo Ann?   Yep!  You guessed it, PAPER.  Loads and loads of beautiful paper.  My heart was beating pretty fast, but I looked down and headed for the cashier.  Before I knew it, I was leaving the store with only glue.  Granted it was the second day of my own "Use what you have" challenge - so my hands weren't shaky yet, but it was pretty huge for me.

What is your favorite crafting supply?  

Toodles,  Jamie

Wednesday, June 12, 2013

Summer Challenge

Hi everyone!  I am so happy for summer break.  I have long lists of things to do that were neglected during the school year, but I also have some fun planned.  About the middle of April, my card supply had dwindled down to hardly anything.  I had to resort to the unthinkable...yes, it's true...I gave store bought cards.  AKKK! 

 Now that I have settled in to my summer routine I am making a vow to stamp a little something everyday.  As I was going though my supplies to see what papers I wanted to use yesterday, I was kind of overwhelmed.  I know that we have all said it, but I have invested way to much in papers, stamps, embellishments and ribbons to let them just gather dust in my studio.   

So here is the Challenge:
  
ONE CARD EVERY DAY USING ONLY WHAT I HAVE IN MY STUDIO

What do you think?  I am going to allow myself to buy adhesive, but that's all.  Do you want to join me?  I would love to hear about and see all of the new projects you are working on using all of those supplies that you have stored up in you craft room.  

So here we go!  

Day 1:


This little card was made using "Family Ties" papers by Pebbles, "Story Tellers" cardboard stickers by Crate Paper.  Quick and easy enough to still have time to pretty up the inside of the card.


Voila!  One day down...? to go.  I know I should count, but that makes the summer a quantitative  period of time.  I prefer to think of it as so far away the days couldn't possibly be counted.

until my next card,
jamie


Sunday, February 3, 2013

Firsts and Favorites

Do you play favorites?  I have to shamefully admit I do.  Not with my children, but with my projects for sure.  I seem to have attachments to certain sewing projects.  It is usually whatever I have most recently finished.  So, here is the fave as of five minutes ago.  (I couldn't wait to share it.)


The fine weave burlap started out it's life a a laundry sack for an army kitchen.  It was smelly and crazy wrinkled.  But at $5, it was screaming, "Take me home and make something cool with me!" FYI...Jeff was screaming, "Take me home, these vintage textiles smell awful!"  After weeks of cleaning treatments and heavy duty steaming and ironing it became the perfect pallet for a willow tree and a small flock of woolly friends. 

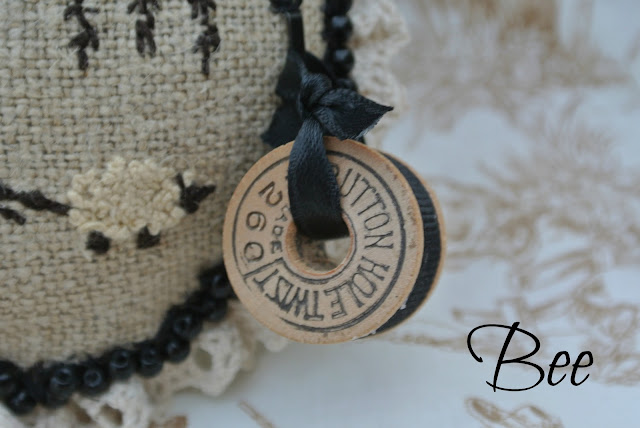
The antique wooden bobbin was a score from a local Antique Mall.  There is a wonderful booth that features what I can only describe as grab bags full of wonderful vintage sewing notions.  You can't always see what you are buying, but her affordable prices and wonderful goodies make it well worth taking a chance.  This picture also gives a better look at the black beads and crochet lace trim around the edging.
 
This cushion started out just as many of mine do, two circles sewn together and turned.  The back is soft black wool felt.  I am no purist when it comes to embroidery,  I just worked on each element until I was happy with the result.  Stitches include; running, cross, back and a few french knots for the curly lambs wool.
 
Now on to firsts. This was my first attempt at making a pin cushion. I went to my old stand by, muslin. Before any sewing I rubber stamped the images with black staz-on ink. After that the assembly was just a basic rectangle pillow construction.

 
I left the ends natural and they have frayed a little (which I love!).  A quick bow, buttons and two little corsage pins and I was hooked.  From that moment on it was all about pin cushions for me.

 
So, how about you?  Do you play favorites?  What it your current obsession?
Can't wait to hear about it!
 
toodles, j

Sunday, January 27, 2013

Here a pin, there a pin...

EVERYWHERE a pin cushion.  More pin cushions today.  Up first today is a little felted birdy on a traditional flower shaped cushion.  A while back I posted a felted pumpkin and the link to purchase the kit I used to create it.  I took that lesson, and some wool roving from Hobby Lobby and made this little robin.  I think it dressed up this basic pin cushion well.  Also added a few Tim Holtz vintage look safety pins an it seemed complete.  The circular pin could actually hold a gift card, place card, or any kind of greeting, but for now I like it empty.

 
Another little pin cushion that I put together using the same basic cushion pattern is this pink fleece felt piece.  This went together in a snap with two dies from Die-namics.  The rolled rose and small hearts.  A few CTMH stick pins and I was in love! (again)
 
 
Finally today I want to share a project that I did almost a year ago, but haven't gotten around to posting. It includes a little cushion, but also uses my old standard scrapbooking papers and embellishments.
 
 
I started with a plain white box with a hinged lid.  Cut paper to fit just inside the top bottom and sides.
 
 
 Added a little paper to the inside and created a little envelope with burlap paper.
 
 
The super easy square cushion fit down into the center.  A button is holding the ribbon that will tie the gift card into the box.


 I felt much better about giving a kind of impersonal gift card when I was able to present it in this little box. 
 
Are you on project overload?  I will try to slow things down, maybe not three projects at once next time.  I'm just so happy to be back to blogging that I can't share enough.
 
toodles,
jamie


Tuesday, January 22, 2013

Have you made anything good lately?

     That was the question a friend asked, when I bumped into her in December.  My answer was not really.  But when I got home I realized that I hadn't made anything with paper in awhile, but I had been feeding my pin cushion addiction with crochet and sewing.  Over the next few weeks I will be sharing them here at BEE.  Even if you don't have a practical use for a pin cushion, these fun designs make a perfect accessory to many rooms of the house.

The pin cushions pictured below is my first attempt.  This one recycled an old quilted toile pillow sham for fabric, an antique dog figurine, and a few beads added to pearl top corsage pins.  I will put together a tutorial for this style pin cushion as it has been my favorite to make so far, and you will see them in future posts, but for now it is simply two circles; sew around the perimeter, turn, stuff, close and embellish.  Easy peasy.
 
 
The next one is a crochet project.  I found it on Pintrest...of course!  The pattern can be found at Hooked on Needles .  I appreciate her giving us such a cute pattern to use. Check it out if you crochet.  It is easy and super fast.  The pins on this one are a little more difficult to see, but they are also pearl top corsage pins with small green flower beads under the pearl.
 
 
 Lastly, I want to share a no sew pin cushions.  Also found the idea and instructions on pintrest, but the assembly is pretty straight forward.  I took the disk portion of a canning jar lid and glued batting to the top.  Covered it with fabric and then slid the ring over the top.  I didn't use glue,  it fit pretty snug once I got it in place, but if you wanted to you could glue the disk into the ring.  A little leftover lace trim finished the lid out perfectly.   Next I added a few little treasures; vintage thimble, vintage rhinestone clover pin, and a crinkled seam binding bow.  It is kind of difficult to see, but there is a little needle threader hanging below the thimble.
 
 
Accessorizing these little creations is my favorite part. 
 
So, have you made anything good lately?  I look forward to hearing about it!
 
Toodles,
jamie
 
 
Linking up at...-Crafty, Scrappy, Happy Check it out they have some great projects.